
Wildlife Starts with Soil
Truly thriving gardens aren’t just about the plants we see above ground; they’re about the life teeming beneath our feet. Healthy soil isn’t merely a growing medium, it's the foundation of a vibrant ecosystem, the literal groundswell of biodiversity. We often focus on flowers and foliage, but a flourishing garden needs a robust and active soil ecosystem to support it all.
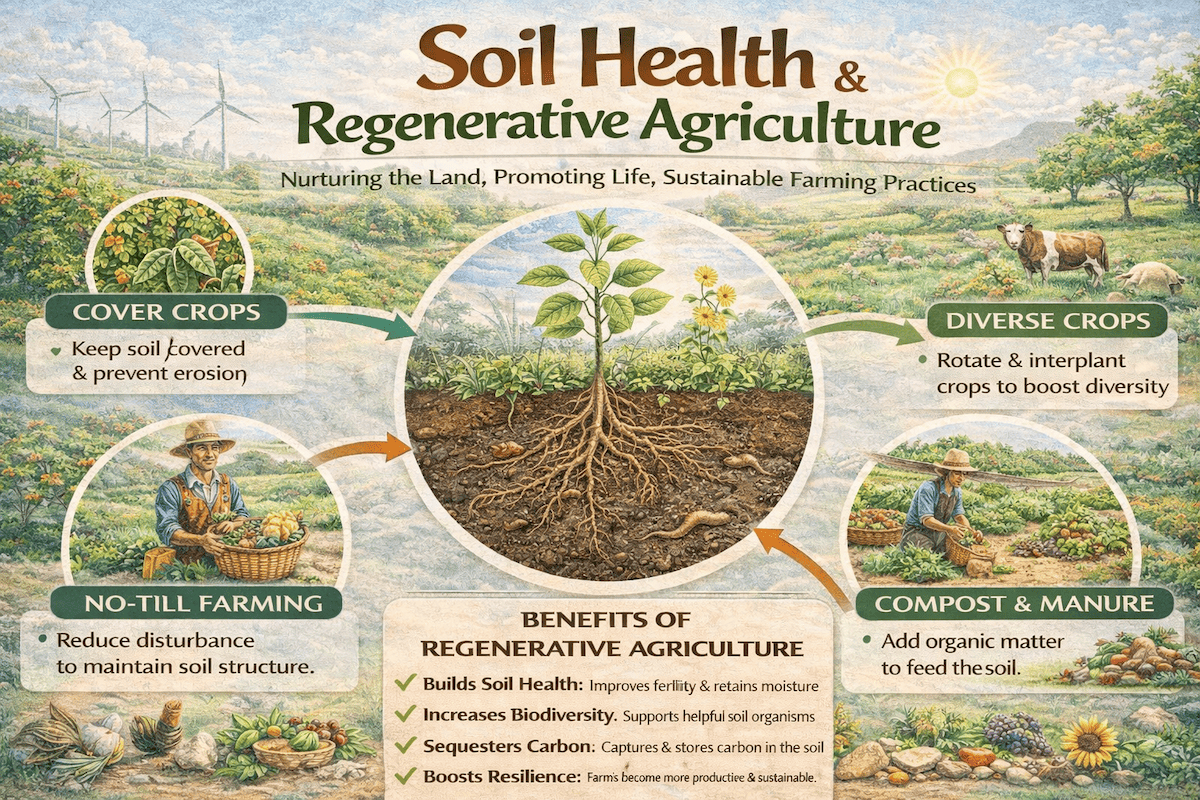
Regenerative soil practices shift from conventional gardening, which treats soil as an inert substance, to a more holistic approach. These practices rebuild soil organic matter and restore natural biological cycles by working with nature. This approach actively participates in ecological restoration.
The decline of insect populations is deeply connected to soil health. Insects, birds, and other wildlife rely on healthy soil ecosystems for food, shelter, and breeding grounds. Degraded soils mean degraded habitat for these creatures. A garden built on healthy soil becomes a haven for life and a small act of conservation.

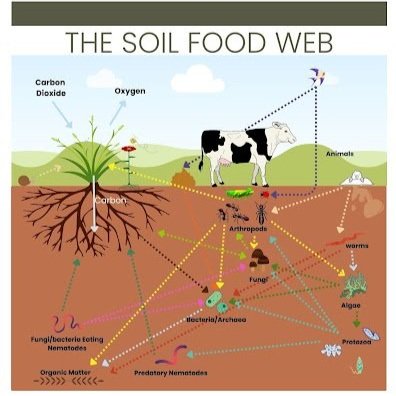
The Soil Food Web: A Hidden World
Beneath the surface, a complex and dynamic community known as the soil food web is constantly at work. This bustling network of organisms ranges from microscopic bacteria and fungi to larger creatures like nematodes and arthropods. Bacteria are the primary decomposers, breaking down organic matter into simpler compounds that plants can use.
Fungi play a role in nutrient cycling and soil structure. Their vast networks of hyphae extend throughout the soil, connecting plant roots and facilitating the exchange of nutrients and water. Protozoa and nematodes graze on bacteria and fungi, releasing nutrients in a plant-available form. Arthropods, like mites and springtails, shred organic matter and create pathways for air and water.
These organisms actively build and maintain soil health. A healthy soil food web improves nutrient cycling, enhances soil structure, and increases plant resilience. Conventional practices like excessive tilling and synthetic fertilizer use disrupt this balance, reducing biodiversity and soil health. Adding compost, avoiding pesticides, and minimizing disturbance contribute to a thriving soil food web.
Our actions have a significant impact. Using broad-spectrum insecticides kills pests and decimates beneficial soil organisms. Building a healthy soil food web creates a resilient system that supports plant growth and wildlife without external inputs.
- Bacteria: Primary decomposers, nutrient cyclers
- Fungi: Nutrient and water transport, soil structure
- Protozoa & Nematodes: Release plant-available nutrients
- Arthropods: Shred organic matter, improve soil aeration
No-Till Gardening: Disturbing Less, Gaining More
No-till gardening is a cornerstone of regenerative soil practices. The principle is simple: avoid disturbing the soil as much as possible. Conventional tilling disrupts the soil food web, destroys soil structure, and releases carbon dioxide. It's a short-term fix that creates long-term problems.
Tilling breaks up fungal networks that connect plant roots, reducing their ability to access nutrients and water. It also brings weed seeds to the surface, creating more work. Tilling compacts the soil below, hindering root growth and water infiltration. Establishing a no-till garden takes upfront effort, but the benefits are worth it.
Sheet mulching, or lasagna gardening, is a great way to establish a no-till garden. Layer cardboard or newspaper over existing grass or weeds, then add layers of organic matter like compost, leaves, and straw. This smothers weeds, builds soil organic matter, and creates a fertile seedbed. Weeds will still emerge but become more manageable with a healthy soil food web and a thick layer of mulch.
Compost: Black Gold for Wildlife
Compost is called “black gold” because it is a powerful soil amendment that improves soil structure, provides nutrients, and supports the soil food web. It also recycles kitchen and yard waste into a valuable resource.
Several composting methods exist. Hot composting, which involves maintaining a high temperature to kill weed seeds and pathogens, requires more effort but produces compost faster. Cold composting is simpler but takes longer. Vermicomposting, using worms to break down organic matter, is ideal for smaller spaces and produces a nutrient-rich compost called worm castings.
Compost quality matters. A well-balanced compost pile contains a mix of “greens” (nitrogen-rich materials like kitchen scraps and grass clippings) and “browns” (carbon-rich materials like leaves and wood chips). Compost provides essential nutrients for plants, improves water retention, and creates a more hospitable environment for beneficial soil organisms. Healthy plants support more wildlife.
Avoid composting meat, dairy, and oily foods, as these attract pests and create odors. Also, avoid composting diseased plants, as pathogens may survive the composting process.
Cover Cropping: Nature’s Soil Builders
Cover crops are plants grown to improve soil health. They offer benefits including improved soil structure, weed suppression, nitrogen fixation, and erosion prevention. They act as a living mulch, protecting the soil and building organic matter.
Different cover crops offer different benefits. Legumes, like clover and vetch, fix nitrogen in the soil for subsequent crops. Grasses, like rye and oats, add organic matter and improve soil structure. Brassicas, like radishes and turnips, break up compacted soil and scavenge nutrients.
Timing is important for cover cropping. Plant cover crops after harvesting main crops in the fall, or in early spring before planting. Terminating the cover crop—by cutting it down or crimping it—releases nutrients back into the soil. Local agricultural extension offices can provide specific timing recommendations for your region.
Cover crops benefit pollinators and other wildlife by providing food and shelter. Flowering cover crops like crimson clover attract bees and other beneficial insects.
- Legumes (clover, vetch): Fix nitrogen
- Grasses (rye, oats): Improve soil structure
- Brassicas (radish, turnip): Break up compacted soil
Cover Crop Comparison for Wildlife Gardens
| Species | Nitrogen Fixation | Weed Suppression | Soil Structure Improvement | Growth Habit | Ideal Planting/Termination |
|---|---|---|---|---|---|
| Crimson Clover | High | Medium | Medium | Erect, bunch-type | Fall/Early Spring - Spring |
| Hairy Vetch | High | High | Medium | Vining | Fall - Spring (terminate before seed set) |
| Winter Rye | Low | High | High | Bunch-type, tall | Fall - Spring (terminate before seed set) |
| Oats | Low | Medium | Medium | Erect, quick growing | Fall/Early Spring - Spring (frost kills) |
| Buckwheat | Low | Medium | Low | Spreading, fast growing | Late Spring/Summer - Before frost |
| Annual Ryegrass | Low | Medium | Medium | Bunch-type, fibrous roots | Fall/Early Spring - Spring |
| White Clover | Medium | Medium | Medium | Creeping, low-growing | Spring/Fall - Perennial, manage regularly |
Illustrative comparison based on the article research brief. Verify current pricing, limits, and product details in the official docs before relying on it.
Mulch: Protecting and Nourishing
Mulching is a simple, effective way to improve soil health and support wildlife. A layer of mulch conserves moisture, suppresses weeds, regulates soil temperature, and protects the soil from erosion. It also provides habitat for beneficial insects and other small creatures.
Many mulch types are available, each with pros and cons. Wood chips break down slowly, providing long-lasting benefits. Straw is a good option for vegetable gardens but can harbor weed seeds. Leaves are a readily available and inexpensive mulch but can mat down and prevent water infiltration.
Avoid dyed mulch, as dyes can contain harmful chemicals. Be mindful of where you source wood chips, as some may contain herbicides or other chemicals that could harm plants and soil organisms.
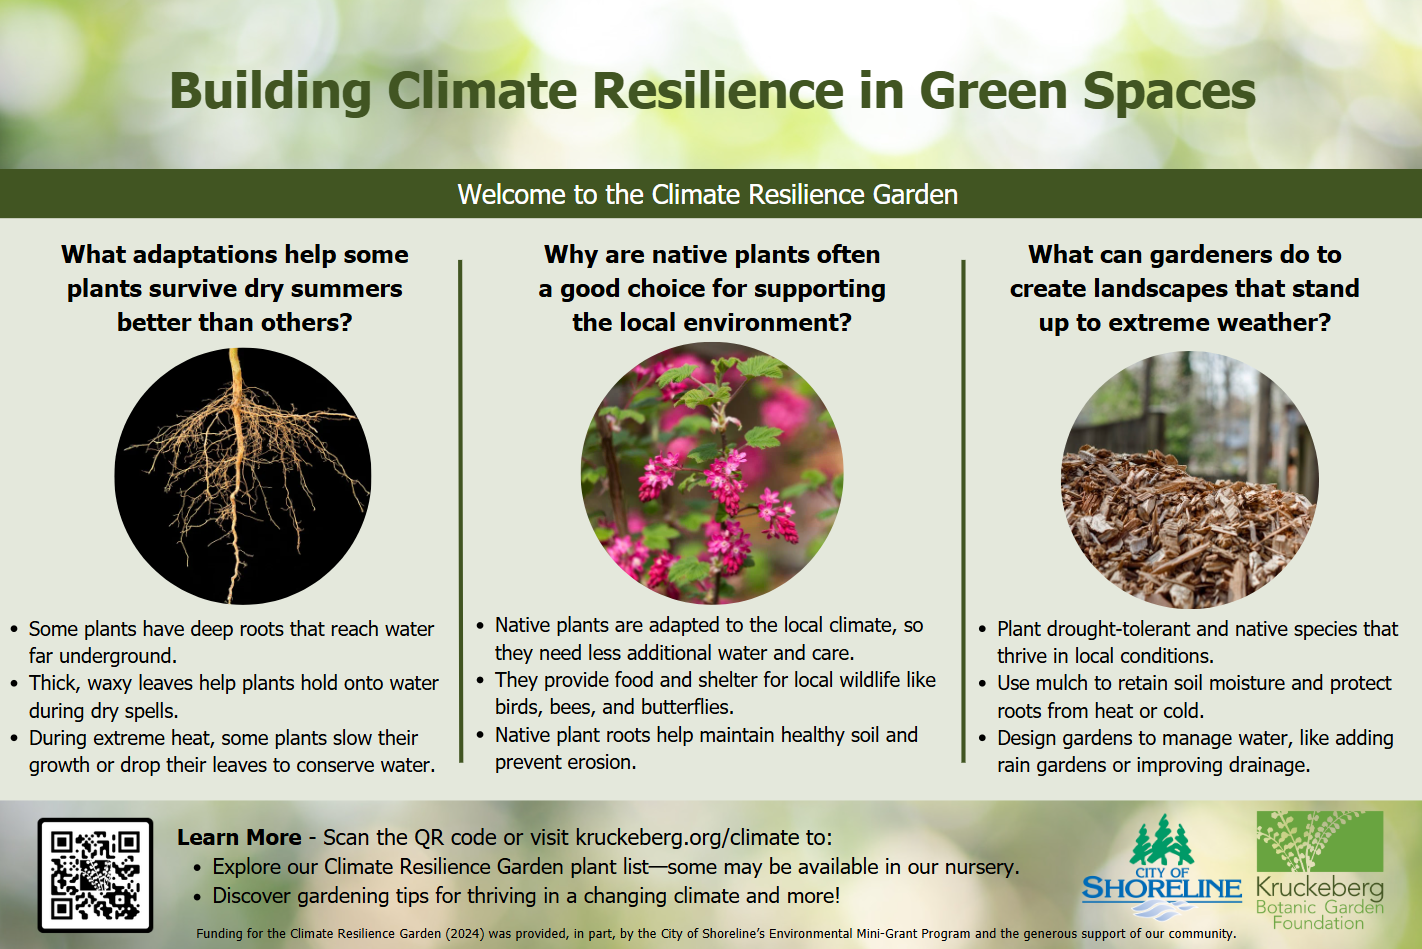
Native Plants & Soil Synergy
Native plants have evolved to grow in a specific region and are adapted to local soil conditions, climate, and wildlife. Choosing native plants is a step in creating a sustainable and wildlife-friendly garden.
Native plants have developed symbiotic relationships with local soil organisms and pollinators. They require less water, fertilizer, and pesticides than non-native plants, making them a more environmentally
Regenerative soil practices enhance the benefits of native plants. Healthy soil provides the nutrients and support that native plants need to thrive. In turn, native plants contribute to soil health by adding organic matter and supporting the soil food web. Resources like the Lady Bird Johnson Wildflower Center () are invaluable for finding native plant information for your region.
- Consider your soil type: Sandy, clay, loam
- Choose plants adapted to local climate: Rainfall, temperature
- Prioritize plants that support local wildlife: Pollinators, birds
Native Plants for Diverse Soils
- New England Aster (Symphyotrichum novae-angliae) - Thrives in moist loam to dry, sandy soils. A late-blooming flower crucial for migrating Monarch butterflies and provides seeds for birds in the fall.
- Wild Lupine (Lupinus perennis) - Prefers well-drained, sandy or loamy soil. The sole host plant for the Karner Blue butterfly, and its seeds are enjoyed by birds.
- Black-Eyed Susan (Rudbeckia hirta) - Adaptable to a wide range of soils, including clay, loam, and sand. Attracts bees, butterflies, and goldfinches who feed on its seeds.
- Blue Flag Iris (Iris versicolor) - Prefers moist to wet soils, including clay and loam. Provides nectar for ruby-throated hummingbirds and shelter for amphibians.
- Little Bluestem (Schizachyrium scoparium) - Tolerates poor, dry, sandy, or clay soils. Provides nesting material for birds and overwintering habitat for beneficial insects.
- Common Milkweed (Asclepias syriaca) - Grows well in a variety of soils, including loam, clay, and sand, but prefers moist conditions. Essential host plant for Monarch butterflies and a nectar source for many pollinators.
- Switchgrass (Panicum virgatum) - Adaptable to various soil types, including clay and sandy loam. Offers excellent cover for ground-nesting birds and small mammals, and its seeds provide food.
Putting It All Together: A Long-Term Vision
Building a regenerative wildlife garden is a journey, not a destination. It requires a holistic approach to soil health, plant selection, and habitat creation. Remember that it takes time for soil ecosystems to recover and thrive. Don't be discouraged by setbacks—they are part of the learning process.
Start small and experiment with different practices. Try composting, no-till gardening, cover cropping, and mulching. Observe your garden closely and learn what works best in your specific environment. Be patient, and trust the power of nature to heal and regenerate.
Creating a regenerative wildlife garden is an investment in the future—a future where our gardens are not just beautiful spaces, but also thriving ecosystems that support biodiversity and contribute to a healthier planet. Audrey’s Little Farm Show on YouTube offers excellent insights and practical advice on regenerative soil practices.

No comments yet. Be the first to share your thoughts!